Anebula is reader-supported. When you buy through links on our site, we may earn an affiliate commission.
This guide is part of the How to host multiple sites on one virtual machine with Docker series where you learn how to create a virtual machine (VM) to host multiple websites and apps. In this series, we will host a WordPress blog, a Ghost blog, a Matamo Analytics app, and much more!
Up to this point, we have purchased a domain and set up the domain with Cloudflare DNS, then we created a VM on Digital Ocean. Now it is time to connect to that VM.
Now when it comes to SSH clients to connect to a VM you will have lots of options. One of the most ubiquitous solutions is Putty. However, I find Putty to be outdated and lacking the modern features that you get with Visual Studio Code. For that reason, I do all my SSHing with VSC now.
Part 1: Download Visual Studio Code (VSC)
Head over to https://code.visualstudio.com/, download, and install VSC on your computer.
Part 2: Install Remote SSH Extension
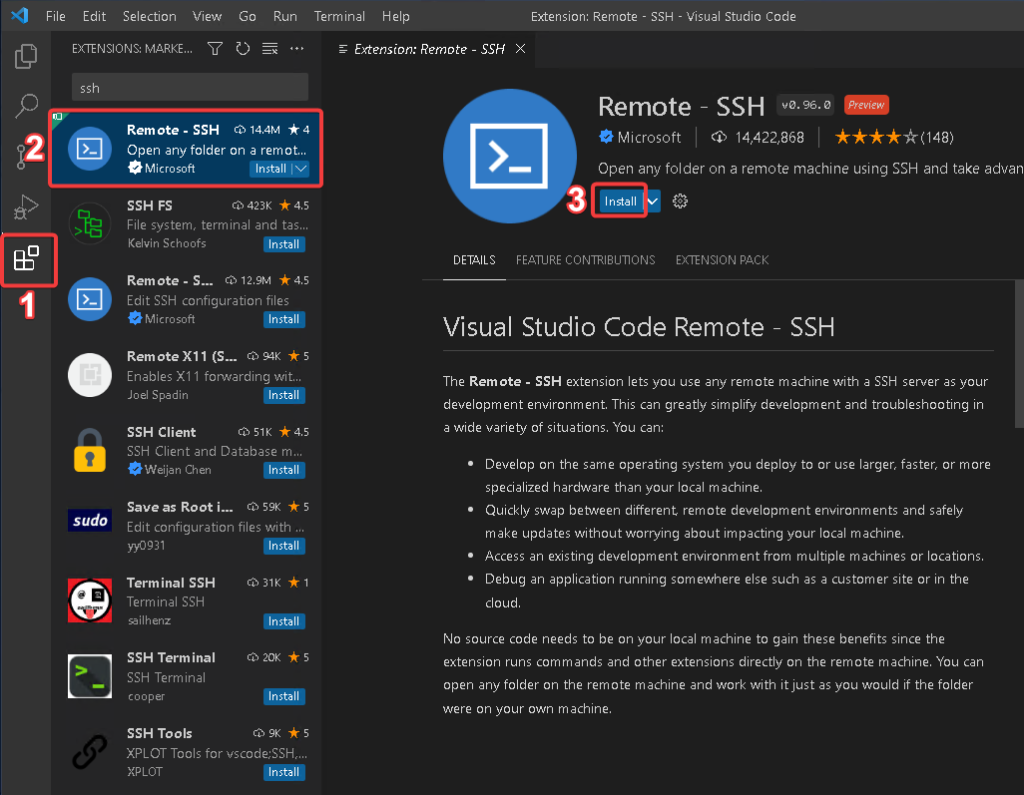
Open VSC, then under extensions search for “ssh” and install Remote – SSH by Microsoft extension.
Part 3: Set up Remote SSH extension
In VSC, click on the new Remote Explorer extension, then under SSH click on the gear icon, then click on the first item that shows your username\.ssh\config.
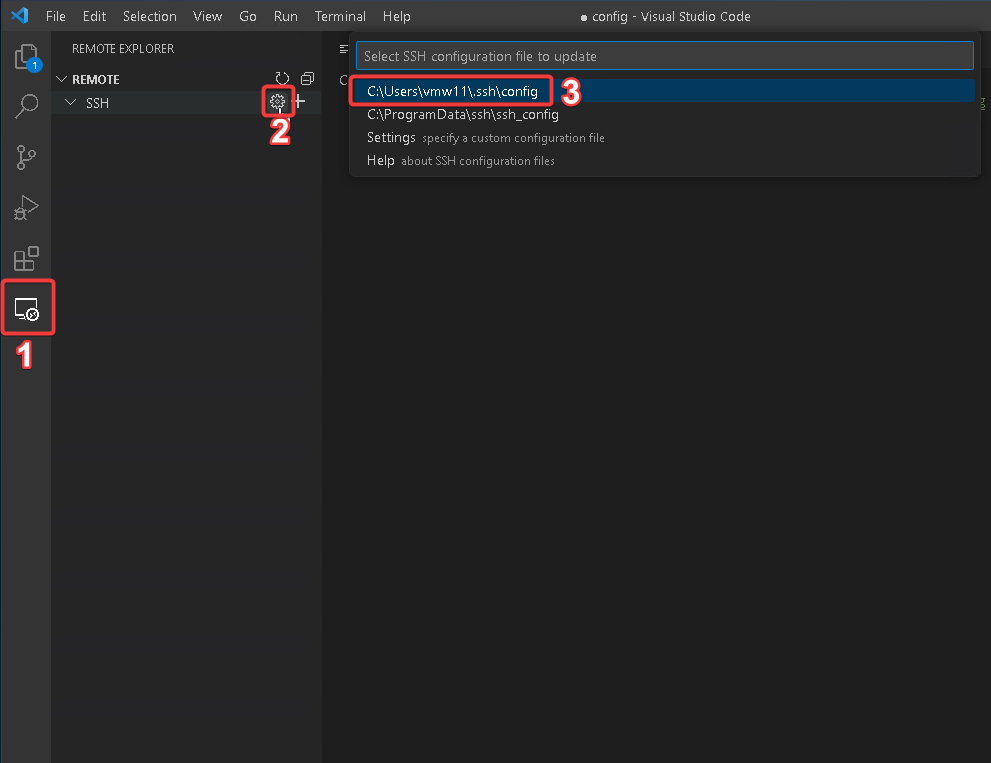
A config file will open up. This is how we will fill it out.
Host droplet
    HostName <the IP of your new VM>
    User <the username of your new vm>
    IdentityFile <path to your openSSH private key file>
| Property | Definition | Example |
| Host | The name of the connection, you can make up any name here as long as there are no spaces in the name. | droplet |
| HostName | The IPv4 of the VM. You can get this from the Droplet page in Digital Ocean. | 54.20.240.56 |
| User | The user who the SSH get is associated with. For Ubuntu on Digital Ocean VMs, this is always “root” by default. | root |
| IdentityFile | Path to your openSSH exported key from PuttyGen | “C:\Users\vmw11\Desktop\SSH Private Keys\dropletopenssh” |
Then save the config and click the refresh button.
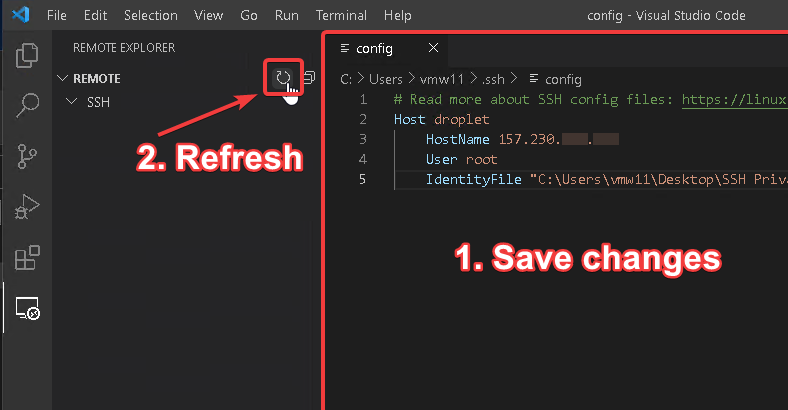
Then a new line will appear showing the new connection and we can connect to it.
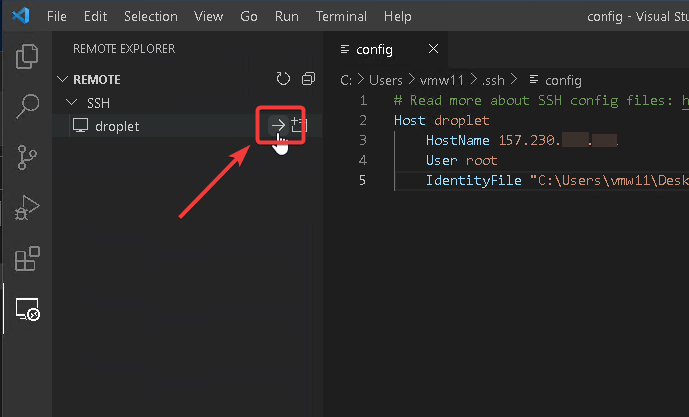
The windows will reload and you can select the following options.
Platform: Linux
Are you sure you want to continue? Continue
Then go ahead and enter the passphrase that you created in PuttyGen (you created this passphrase in the previous post)
At this point, you should be connected. You can verify this by looking at the bottom left corner of VSC. You should see “SSH: droplet”.

Now you can click on Explorer > Open Folder.
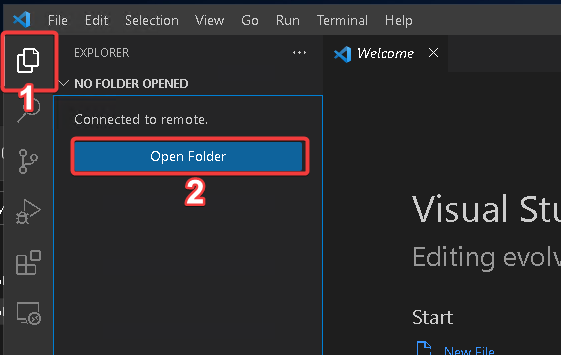
Then leave it to the default “/root/ “to open the root directory and click OK.
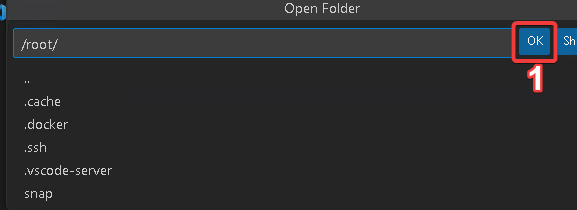
Enter your passphrase again, the window will reload, then you can trust the author since this is your private VM.
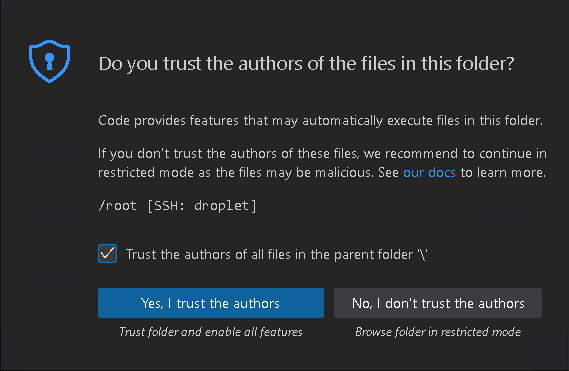
From this point on, you are in the VM and can control it just like you can control your own computer.
This is not covered in this guide, but I highly recommend setting up unattended upgrades to capture security upgrades as they are released. There is a guide for that here.
At this point, we are done setting up the machine and we can move on to setting up Docker via Docker Compose.
Continue with Part 5: How to set up NGINX Proxy Manager using Docker Compose
